0x01 前述
博客建立在腾讯云上,原来用的是腾讯企业邮箱提供的SMTP服务器来收发邮件,起初认为都是腾讯产品,应该不至于出太大问题,也方便管理,另外刚开始用的性能还算可以,就凑合着用了。但是这几天回来一试,发信往往需要3s以上的时间,性能低下到无法忍受,甚至出现了掉信的情况。遂弃用腾讯企业邮箱(说到底还是因为用的免费版,没有充钱),利用Postfix+Dovecot搭建自己的邮件服务器。
0x02 环境
腾讯云 CentOS 7.2
0x03 安装和配置Postfix
首先先删除sendmail:
1 | yum remove sendmail |
随后安装Postfix和Cyrus:
1 2 | yum install postfix yum install cyrus* |
修改MTA(默认邮件传输代理):
1 | alternatives --config mta |
选择sendmail.postfix对应的选项,回车。
接着检查一下MTA是否配置成功:
1 | alternatives --display mta |
出现mta – status is manual字样即说明配置成功。
接下来配置Postfix,
1 | vi /etc/postfix/main.cf |
对/etc/postfix/main.cf做如下配置:
1 2 3 4 5 6 7 8 9 10 11 12 13 14 15 16 17 18 19 20 21 22 23 24 25 26 27 28 29 30 31 | # 75行: 取消注释,设置hostname myhostname = mail.edlinus.cn # 83行: 取消注释,设置域名 mydomain = edlinus.cn # 99行: 取消注释 myorigin = $mydomain # 116行: 修改 inet_interfaces = all # 119行: 推荐ipv4,如果支持ipv6,则可以为all inet_protocols = ipv4 # 164行: 修改 mydestination = $myhostname, localhost.$mydomain, localhost, $mydomain # 264行: 取消注释,指定内网和本地的IP地址范围 mynetworks = 127.0.0.0/8, 10.0.0.0/24 # 419行: 取消注释,邮件保存目录 home_mailbox = Maildir/ # 571行: 修改 smtpd_banner = $myhostname ESMTP # 添加到最后 # 规定邮件最大尺寸为10M message_size_limit = 10485760 # 规定收件箱最大容量为1G mailbox_size_limit = 1073741824 # SMTP认证 smtpd_sasl_type = dovecot smtpd_sasl_path = private/auth smtpd_sasl_auth_enable = yes smtpd_sasl_security_options = noanonymous smtpd_sasl_local_domain = $myhostname smtpd_recipient_restrictions = permit_mynetworks,permit_auth_destination,permit_sasl_authenticated,reject |
修改好了之后使用service postfix start开启postfix,使用chkconfig postfix on将postfix开机启动。
0x04 安装Dovecot
1 | yum -y install dovecot |
随后进行Dovecot的配置工作,
1 2 3 4 5 6 7 8 9 10 11 12 13 14 15 16 17 18 19 20 21 22 23 24 25 26 | [root@edlinus ~]# vi /etc/dovecot/dovecot.conf # 26行: 如果不使用IPv6,请修改为* listen = * [root@edlinus ~]# vi /etc/dovecot/conf.d/10-auth.conf # 9行: 取消注释并修改 disable_plaintext_auth = no # 97行: 添加 auth_mechanisms = plain login [root@edlinus ~]# vi /etc/dovecot/conf.d/10-mail.conf # 30行: 取消注释并添加 mail_location = maildir:~/Maildir [root@edlinus ~]# vi /etc/dovecot/conf.d/10-master.conf # 88-90行: 取消注释并添加 # Postfix smtp验证 unix_listener /var/spool/postfix/private/auth { mode = 0666 user = postfix group = postfix } [root@edlinus ~]# service dovecot start [root@edlinus ~]# chkconfig dovecot on |
0x05 域名解析
添加一个子域名mail,A记录解析到服务器IP。
再添加一个MX记录,主机记录为空,记录值为上面解析的二级域名mail.edlinus.cn,优先级10。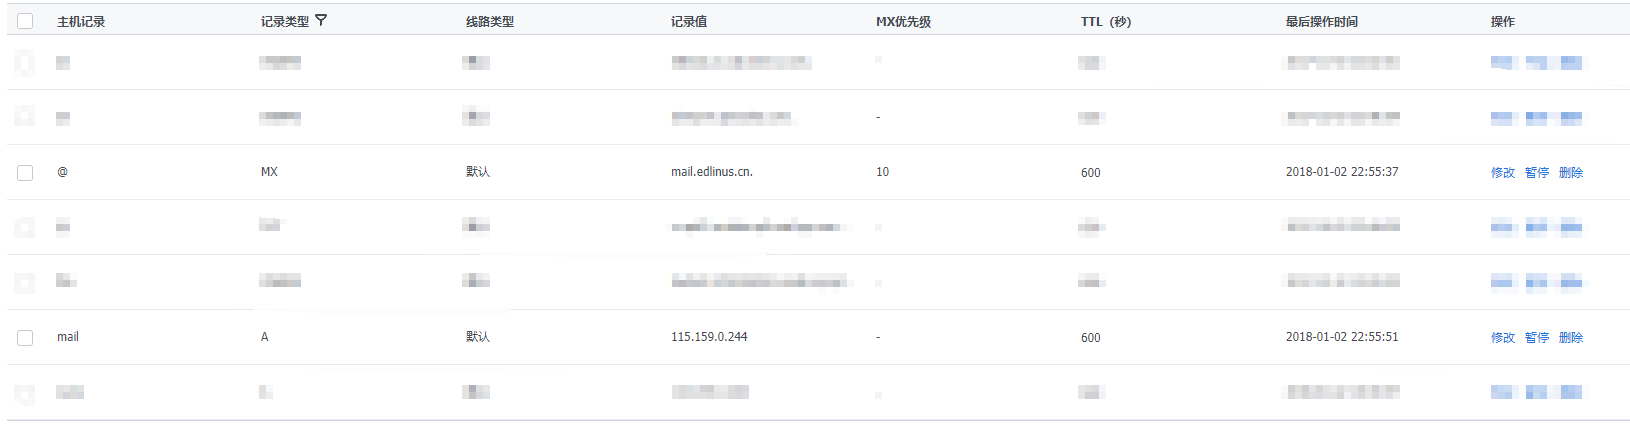
0x06 添加用户
1 2 3 4 | # 创建用户 useradd admin #设置密码,会要求输入两次密码 passwd admin |
0x07 配置SSL
为了客户端与服务器之间通信的安全,可以说配置SSL是配置邮件服务器的必经之路。
1 | vi /etc/postfix/main.cf |
1 2 3 4 5 6 7 8 9 10 | #TLS Support smtp_tls_security_level = may smtpd_tls_security_level = may smtpd_tls_key_file = /etc/pki/tls/private/mail.edlinus.cn.key smtpd_tls_cert_file = /etc/pki/tls/certs/mail.edlinus.cn.crt # smtpd_tls_CAfile = /etc/pki/tls/root.crt smtpd_tls_loglevel = 1 smtpd_tls_session_cache_timeout = 3600s smtpd_tls_session_cache_database = btree:/var/spool/postfix/smtpd_tls_cache tls_random_source = dev:/dev/urandom |
1 | vi/etc/postfix/master.cf |
在smtp inet n – n – – smtpd行下,加入如下一行打开465端口:
1 | smtps inet n - n - - smtpd -o smtpd_tls_wrappermode=yes |
1 | vi /etc/dovecot/conf.d/10-auth.conf |
1 | disable_plaintext_auth = yes |
1 | vi /etc/dovecot/conf.d/10-ssl.conf |
修改ssl证书和密钥的路径以及ssl chiper
1 2 3 | ssl_cert = /etc/pki/tls/certs/mail.edlinus.cn.crt ssl_key = /etc/pki/tls/private/mail.edlinus.cn.key ssl_cipher_list = ALL:!LOW:!SSLv2:!EXP:!aNULL |
0x08 后续处理
上述步骤做完,发现在腾讯云上依旧无法正常收发信,查看mailog之后发现Connection time out,原因在于腾讯云限制了25端口的TCP Traffic,虽说这样有些不太妥当,不过也可以理解,毕竟垃圾邮件滥用25端口后造成IP置信度降低导致以后发信全都进垃圾箱了就为时已晚了。
搜索了一下网络上对于主机提供商封锁25端口的解决方案,发现大部分是通过SMTPS来实现Client-Server之间的通信,也就是将25端口的入流量转到465端口上,但是由于邮局与邮局之间通信规定是25端口,所以25端口出入流量这个问题很难解决,也就是说无法收发信的问题只有通过腾讯云控制台解锁25端口以后才能得以解决。